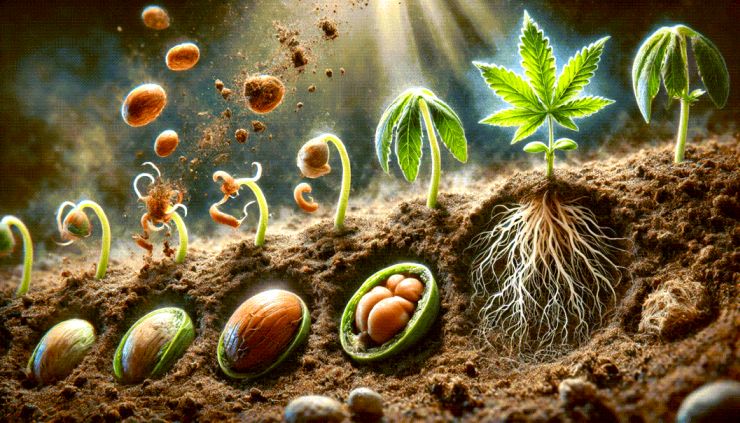
Germinating Cannabis Seeds
Step 1: Gather Essential Materials

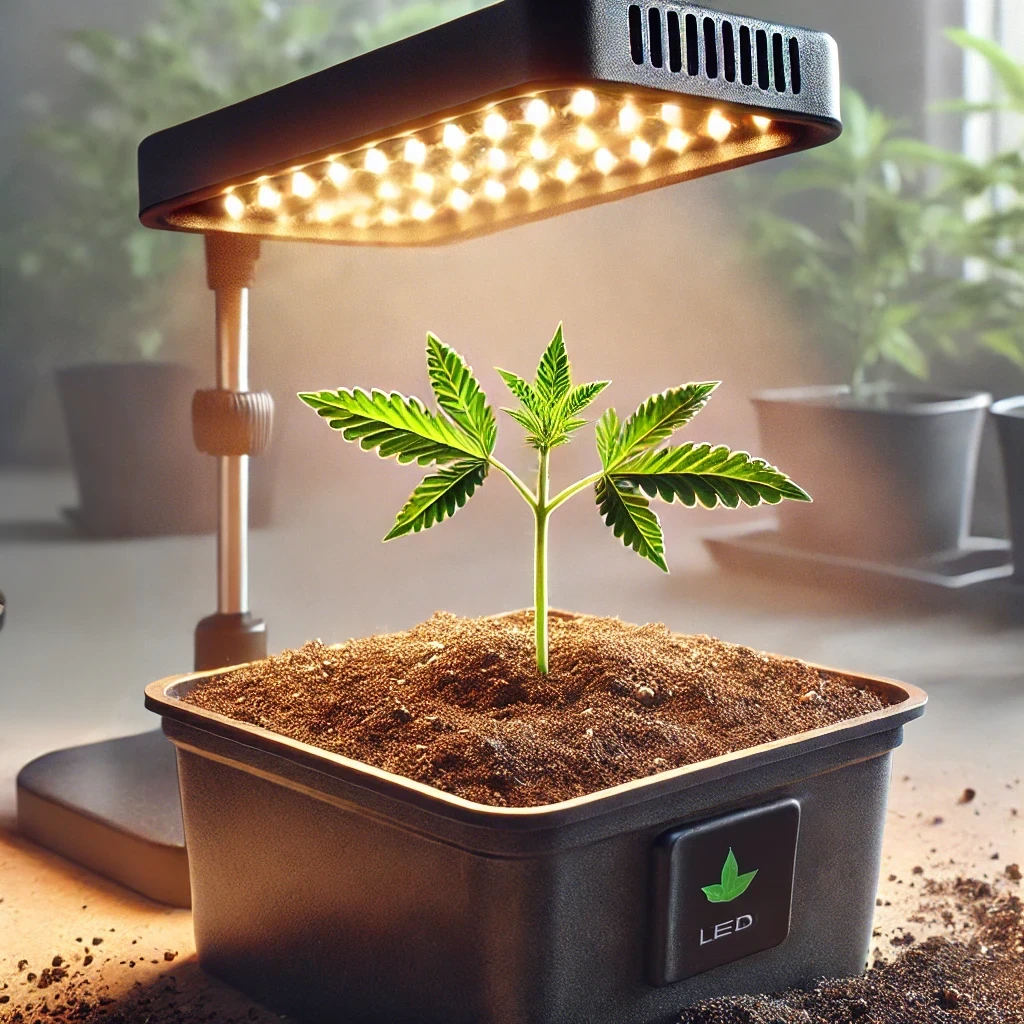
🌱 Stage 1 🌱
Starting your first grow can feel overwhelming, but remember, it's all about learning as you go. Take notes on each step, from setup to harvest. When you start your second grow, refer back to those notes and tweak just one or two things and remember,
Small changes, big yield!


- Soil Growers: Use a lightweight, nutrient-poor seedling soil mix. Avoid rich soil at this stage, as it can overwhelm the young plant.
- Coco Growers: Use coco coir, which provides good aeration and retains moisture well. Ensure it’s been properly rinsed and pH-balanced to around 5.8–6.2.
- Hydroponic Growers: Use a peat plug or rockwool cube for easy transfer to the hydro system later. Soak these plugs in pH-balanced water before planting.
- Make a shallow hole about 1/2 inch deep in the growing medium.
- Gently place the seed in the hole with the taproot pointing downward.
- Cover lightly with the growing medium, being careful not to pack it down tightly—roots need space to breathe and spread.
Step 4: Water and Create Humidity for Optimal Growth
Water your container lightly, ensuring that the medium is moist but not saturated. Cover the container with a humidity dome or loosely cover it with plastic wrap to trap warmth and moisture. This helps create a mini-greenhouse effect, which is especially helpful for seedlings that thrive in high humidity.Position
the container under a soft light, such as a CFL or LED, to
encourage healthy sprouting. Maintain warmth (70–85°F)
around the container, as stable warmth helps the seedling
develop strong roots and a healthy stem.
Step 5: Transition Seedling to Light and Air
As
the seedling develops its first set of true leaves (beyond the
initial cotyledons), it’s ready to be transferred to a larger
pot.
Step 6: Prepare the Cloth Pot and Final Growing Medium
For your seedling’s “forever home,” you’ll use a cloth pot, which is excellent for root aeration and drainage. Set it up according to your chosen medium:
- Soil: Fill the cloth pot with a high-quality, nutrient-rich soil mix designed for cannabis or similar plants. This mix should have good drainage to prevent over-watering.
- Coco: Fill the cloth pot with a well-rinsed coco coir mix. Since coco is an inert medium, you’ll need to feed the plant nutrients throughout its growth. A coco-specific nutrient solution will work best here.
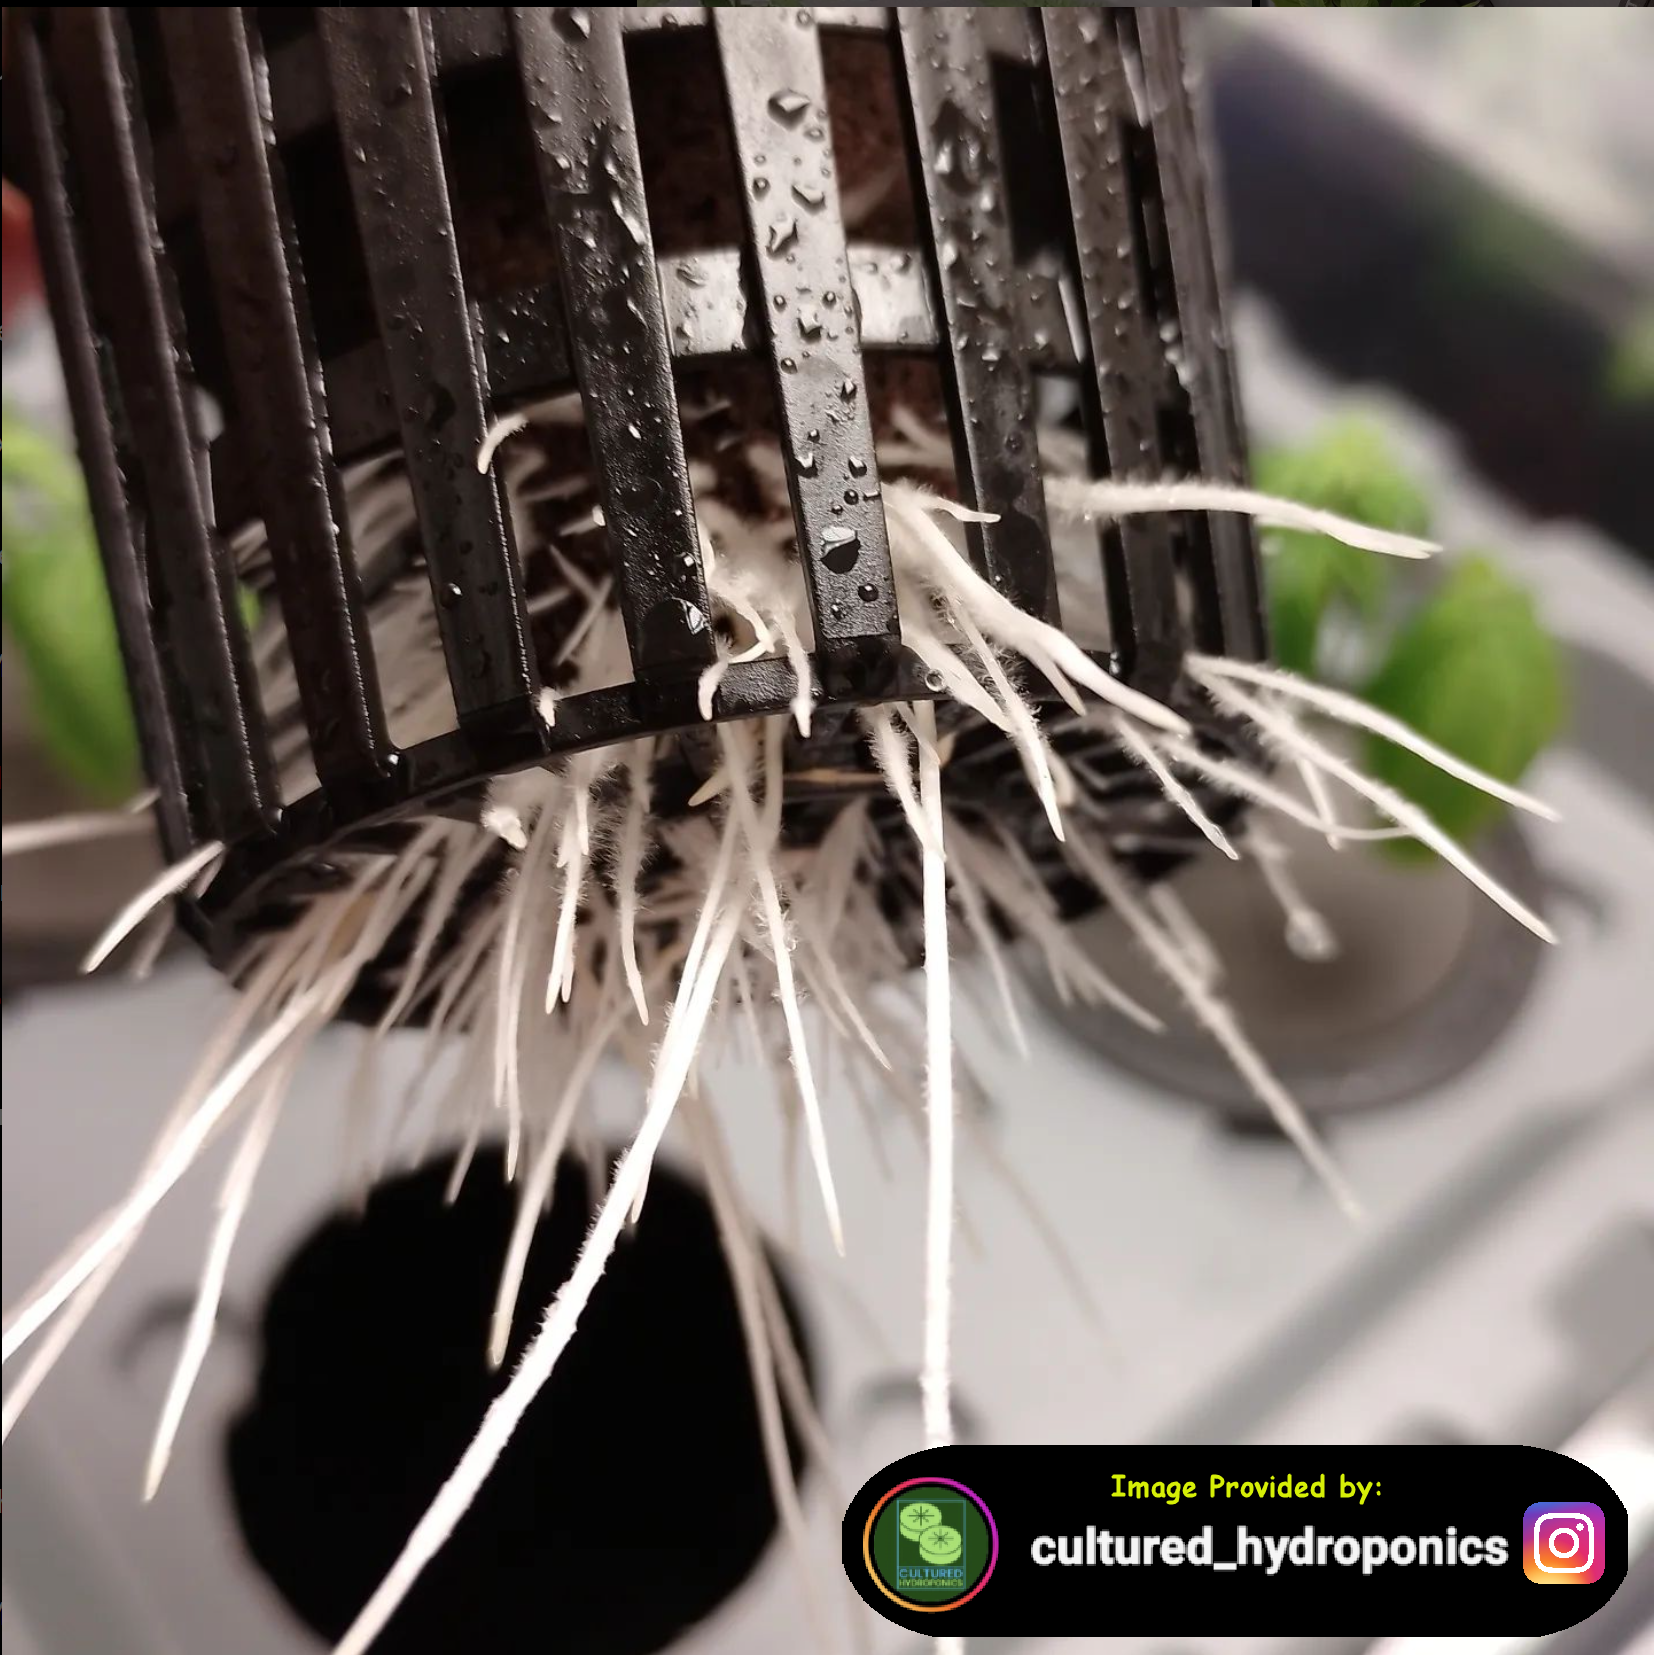
- Hydroponics: If you’re using a recirculating or drip system, set up a net pot inside the cloth pot with clay pebbles, allowing the roots to reach the nutrient solution.
Step 7: Transplant the Seedling into the Cloth Pot
🌱
Stage 2 🌱The growing process has officially begun! Capture each stage with photos to document your plant's progress and celebrate the journey toward a thriving masterpiece
Carefully dig a small hole in the cloth pot to accommodate the
seedling’s root ball. To minimize transplant shock, follow these
steps based on your medium:
- Soil and Coco: Lift the seedling gently by the base of its stem or the edge of the plug, keeping as much of the medium intact around the roots as possible. Place it into the hole and cover the root ball lightly with soil or coco.
- Soil and Coco: Lift the seedling gently by the base of its stem or the edge of the plug, keeping as much of the medium intact around the roots as possible. Place it into the hole and cover the root ball lightly with soil or coco.

-
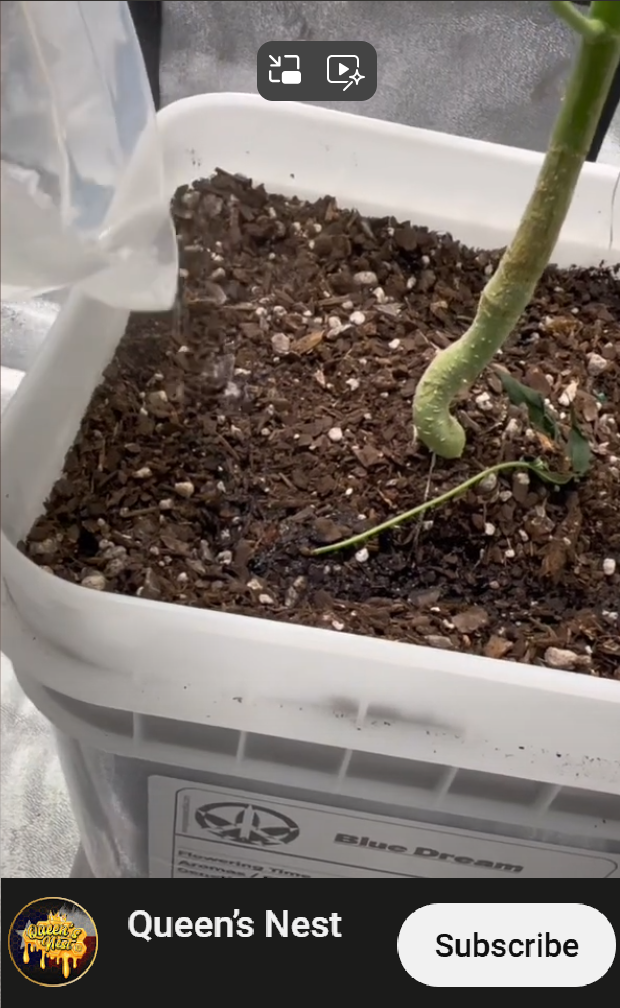
Hydroponics: Place the seedling’s plug or cube into
the net pot, surrounding it with clay pellets to stabilize it.
Ensure the roots have access to moisture at the base of the
net pot, whether by adjusting the water level in a deep-water
culture (DWC) system or setting up the drip to lightly feed
the plant. See the video below as
an example.
Step 8: Watering and Nutrient Setup
Each medium requires a specific watering and nutrient approach to support the young plant’s growth:
- Soil: Water when the top inch of soil feels dry. Avoid overwatering, as the roots are still developing. Start with a diluted nutrient solution after the seedling has settled for a week.
- Coco: Coco retains moisture, but it dries faster than soil, so check frequently and water as needed. Since coco doesn’t contain nutrients, begin feeding with a light nutrient solution.
- Hydroponics: Maintain a light nutrient solution in your reservoir or drip system, typically around 200–300 ppm (parts per million) for young plants. Keep the pH balanced between 5.5 and 6.5, as nutrient uptake is sensitive to pH levels in hydro systems.
Step 9: Post-Transplant Care and Observation
🌱
Stage 3 🌱The journey has begun—your plant is now thriving on its path to becoming a fully mature flower, ready to showcase its beauty and potential. Nurture it well!.
After transplanting, monitor your seedling daily. For optimal growth, check for:
- Moisture: Keep the medium consistently moist without overwatering.
- Nutrients: Follow a feeding schedule that gradually increases nutrient strength as the plant matures.
- Light: Increase light exposure gradually, but avoid intense, direct light at this early stage.
- Temperature and Humidity: Maintain steady warmth and moderate humidity for stress-free growth.
As the roots spread and the plant grows stronger, you’ll see it flourish in its new environment, setting the stage for a healthy, vigorous plant. Following these steps ensures your plant is set up for success, no matter which medium you choose for its forever home.